本文介绍了 Spring Security 的常见功能的配置以及使用的方法。
UserDetailsService
当不配置任何内容时,账号和密码由 Spring Security 生成,而在实际项目中账号和密码应该由数据库中查询出来,所以需要定义逻辑控制认证。
需要自定义逻辑时,只需要实现 UserDetailsService 接口即可,其定义如下:
public interface UserDetailsService {
    // 通过用户名加载用户信息
	UserDetails loadUserByUsername(String username) throws UsernameNotFoundException;

}
这个接口的返回值 UserDetails 也是一个接口,定义如下
public interface UserDetails extends Serializable {
   // 获取用户的全部权限
   Collection<? extends GrantedAuthority> getAuthorities();

   // 密码
   String getPassword();

   // 用户名
   String getUsername();

   // 账号是否失效
   boolean isAccountNonExpired();

   // 账号是否被锁定
   boolean isAccountNonLocked();

   // 凭证(密码)是否过期
   boolean isCredentialsNonExpired();

   // 是否可用
   boolean isEnabled();
}
在 Spring Boot 项目中使用时,只需要重写 UserDetailsService 接口即可,例如:
@Service
public class UserDetailsServiceImpl implements UserDetailsService {
    @Override
    public UserDetails loadUserByUsername(String username) throws UsernameNotFoundException {

        if (!username.equals("admin")) {
            throw new UsernameNotFoundException("用户不存在");
        }

        // 从数据库中获取密码
        String password = "password";
        UserDetails userDetails = new User(username, password, AuthorityUtils.commaSeparatedStringToAuthorityList("admin1, admin2"));
        return userDetails;
    }
}
通过重写 UserDetailsService 接口,可以实现认证操作、授权操作。
注意:出于安全考虑,Spring Security 要求用户名密码不能以明文传送,在自定义时,还必须定义 PasswordEncoder 密码解析器(基于哈希)。
PasswordEncoder
Spring Security 要求容器中必须包含 PasswordEncoder 实例,Spring Security 提供了多种实现方式:
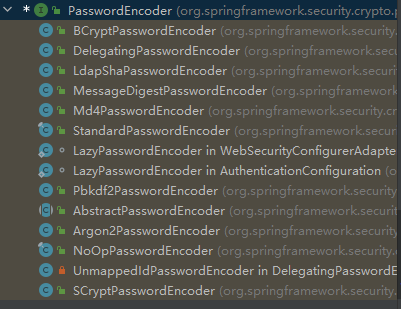
这里以 BCryptPasswordEncoder 为例,进行介绍:
@Test
void test() {
    PasswordEncoder encoder = new BCryptPasswordEncoder();
    // 密码加密
    String encode = encoder.encode("password");
    System.out.println(encode);

    // 密码检查
    boolean matches = encoder.matches("password", encode);
    System.out.println(matches);
}
配置 PasswordEncoder,只需要在配置类中声明它,添加到容器中就行:
@Configuration
public class SecurityConfig {

    @Bean
    public PasswordEncoder passwordEncoder() {
        return new BCryptPasswordEncoder();
    }
}
此时,用户就会发送对于 password 加密后的哈希值,在服务器端,应该使用哈希值与之比对:
@Service
public class UserDetailsServiceImpl implements UserDetailsService {

    @Autowired
    PasswordEncoder encoder;

    @Override
    public UserDetails loadUserByUsername(String username) throws UsernameNotFoundException {

        if (!username.equals("admin")) {
            throw new UsernameNotFoundException("用户不存在");
        }
        // 模拟从数据库中获取密码
        String password = encoder.encode("password");
        // 或者
        // String password = "$2a$10$3u3f2r384JaRvDP6clpgm.xptxdlvI0NVDCvWMrJekUkyPLlwkJlG";
        UserDetails userDetails = new User(username, password, AuthorityUtils.commaSeparatedStringToAuthorityList("admin1, admin2"));
        return userDetails;
    }
}
此时,就可以使用 用户名 admin + 密码 password 登录。
连接数据库实现自定义登录
表格设计如下:

其中,$2a$10$j79RUz7YA4h7xq8JEpW7he8.5X2/Avs7JNHCK8GjwNWZv4MZkK6bG 是密码 penghao 经过 BCryptPasswordEncoder 加密后的结果。
对于 UserDetailsServiceImpl 的设计:
@Override
public UserDetails loadUserByUsername(String username) throws UsernameNotFoundException {

    // 从数据库中查询用户信息,注意区分 User
    site.penghao.springsecuritydemo.pojo.User user = userMapper.getUserByUsername(username);
    if (user == null) {
        throw new UsernameNotFoundException("用户名不存在");
    }
    // 使用查到的密码进行判断
    UserDetails userDetails = new User(username, user.getPassword(), AuthorityUtils.commaSeparatedStringToAuthorityList("admin1, admin2"));
    return userDetails;
}
自定义页面
自定义登录页面
-
创建自己的登录页面,例如:
<!DOCTYPE html> <html lang="en"> <head> <meta charset="UTF-8"> <title>自定义登录页面</title> </head> <body> <form action="/login" method="post"> <input type="text" name="username" /> <br> <input type="password" name="password" /> <br> <input type="submit"> </form> </body> </html> -
修改配置类
@EnableWebSecurity
public class WebSecurityConfig {

    @Bean
    public SecurityFilterChain filterChain(HttpSecurity http) throws Exception {
        // 表单相关配置
        http.formLogin()
                .loginPage("/showLogin")
                .loginProcessingUrl("/login")
                .successHandler((req, resp, auth) -> {
                    resp.sendRedirect("/showMain");
                }) // 登录成功时重定向(或其他操作)
//                .successForwardUrl("/showMain") // 登录成功时请求转发
                .failureHandler((request, response, exception) -> response.sendRedirect("/showFail"))
//                .failureForwardUrl("/showFail")
                .usernameParameter("myUsername")
                .passwordParameter("myPassword");

        // 授权相关配置
        http.authorizeRequests()
                .antMatchers("/showLogin", "/showFail").permitAll()
                    .antMatchers("abc").denyAll()  // 不允许后端名为abc的url访问

                .anyRequest().authenticated();

        http.csrf().disable();

        return http.build();
    }
}
旧版本的 Spring Security 配置:
创建配置类继承 WebSecurityConfigurerAdapter,并重写 configure 方法。
-
注意:Spring Security 同时会对静态页面进行保护,如果需要放行,可以使用:
        http.authorizeRequests()
                .antMatchers("/showLogin", "/showFail").permitAll()
                .antMatchers("/js/**").permitAll()
                .regexMatchers("/css/.*").permitAll()
                .anyRequest().authenticated();
可见,授权配置还支持正则匹配。
自定义错误页面
需要定义一个无权限错误页面(403),通过实现 AccessDeniedHandler 接口进行设置:
@Component

public class MyAccessDeniedHandler implements AccessDeniedHandler {
    @Override
    public void handle(HttpServletRequest request, HttpServletResponse response, AccessDeniedException accessDeniedException) throws IOException, ServletException {

        response.setContentType("application/json;charset=UTF-8");

        PrintWriter out = response.getWriter();

        out.println("{\n" +
                "  \"status\": \"error\",\n" +
                "  \"msg\": \"权限不足,请联系管理员!\"\n" +
                "}");
        out.flush();
        out.close();
    }
}
然后将错误页面的 Handler 进行配置:
根据所给的 Handler 处理(异步,Ajax 异常):
    @Autowired
    MyAccessDeniedHandler myAccessDeniedHandler;
    ....
    http.exceptionHandling()
            .accessDeniedHandler(myAccessDeniedHandler);
此外,对于同步请求的权限异常,可以直接请求转发到目标页面:
        http.exceptionHandling()
	        .accessDeniedPage("/showAccessDenied");
小结
- 实现 UserDetailsService 配置用户的认证,通过 username 查询数据库找到标准 password,通过
UserDetails userDetails = new User(username, password, authority);进行用户认证并授权,用户名、密码、权限信息可以从数据库中查出; - Spring Security 要求容器中必须包含 PasswordEncoder 实例,密码必须以加密形式存储和比对,并且提供了多种实现类,BCryptPasswordEncoder 就是其中一种;
- Spring Security 支持自定义登录页面和权限不足的错误页面,它们是由
@EnableWebSecurity注解修饰的配置类声明的:
@Bean
public SecurityFilterChain filterChain(HttpSecurity http) throws Exception
- 表单相关的配置通过
http.formLogin()进行,授权相关的配置通过http.authorizeRequests()进行。